
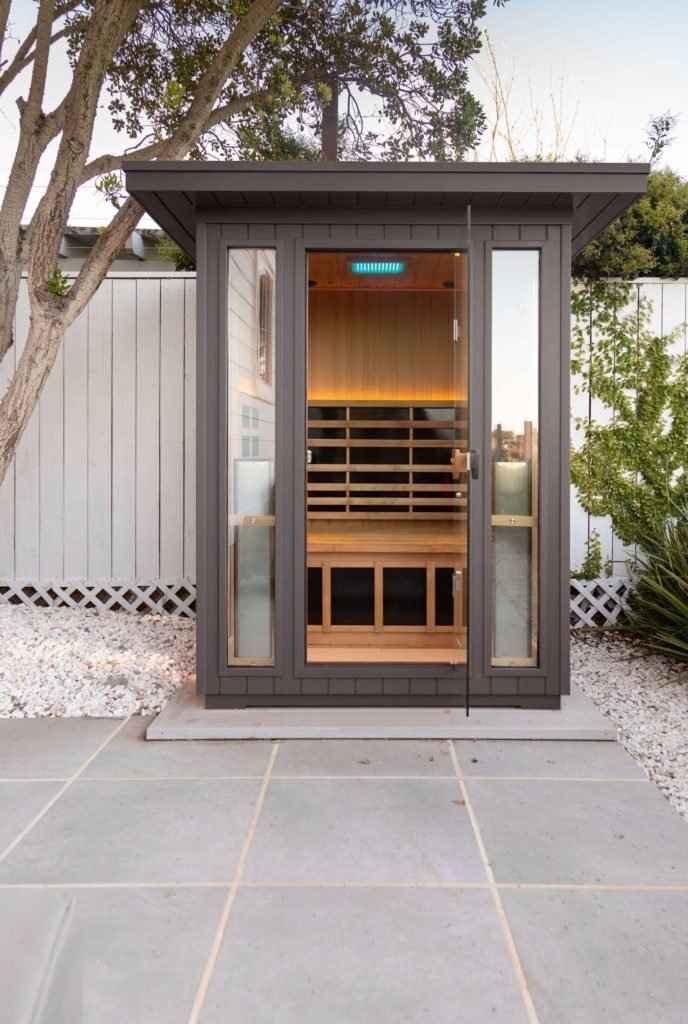
Build a Home Sauna Yourself: Answers to Every Question You Have
Disclosure : This post may contain affiliate links or paid partnerships. I may earn compensation if you click a link or make a purchase, at no additional cost to you. See my disclosure for more info.
You have questions. A lot of them.
Where does the sauna go? What wood do you use? How much does it cost to run? Do you need a contractor? What’s the difference between traditional and infrared? Every question is reasonable. Every question has an answer. The problem is that most resources give you fragments when what you need is the complete picture, in the right sequence. This is that resource. Let’s go through it.
Why Home Sauna Plans Collapse Before Construction Begins
The failure point is almost never the physical work. It’s the paralysis that comes from too much conflicting information and no clear starting point. People start browsing accessories and comfort upgrades before they’ve resolved the fundamental questions. They research a complete sauna kit before they know their room dimensions or heat type. Answer the right questions first. Everything else flows from those answers. This guide puts the questions in the right order.
1. Picking Your Spot — Get This Right and Half the Work Is Done
The best location for a home sauna is the one that already has what you need: drainage, electrical access, and moisture-appropriate flooring. Strong candidates: a basement room or unused bathroom (often already plumbed and wired), a garage corner with exterior wall access, a detached shed or outbuilding, or a large closet converted around a compact single-person infrared cabin.
What the location must provide: a floor drain or the ability to route drainage, electrical panel proximity, and a floor surface that won’t absorb or trap moisture. Concrete and tile are ideal. Vinyl works. Carpet is eliminated immediately. Plan the cool-down sequence too — a post-session shower or exterior door matters more than it sounds. Ceiling height: 7 feet maximum. Heat collects near the ceiling and anything above 7 feet is wasted volume the heater has to work harder to warm.
2. Traditional or Infrared — The Most Important Question You Will Answer
This is the decision everything else branches from. Make it with full knowledge of both options. Traditional Finnish sauna: A stone heater produces high, radiating heat. You add water to the stones to create steam. Temperatures reach 150°F to 195°F. This is the classic, intense, full-body heat experience that has been used for centuries.
Infrared sauna: Radiant panels heat the body directly rather than the air. Operating range is 120°F to 150°F. Energy draw is lower. A well-designed 2-person infrared sauna runs on a normal 120V household outlet. Your answer here determines your wood requirements, your electrical plan, your insulation approach, and your ventilation design. It touches every other decision in this guide. If you want traditional steam, the Finnish method is the only genuine option. If you want a simpler build with a gentler heat profile, infrared is an excellent and legitimate choice.
3. How Big Should It Be — The Numbers That Actually Matter
Bigger is worse. That’s the short answer. An oversized sauna forces the heater to work beyond its capacity, takes longer to reach temperature, costs more to run, and consistently underdelivers on the experience. Build to the appropriate size for your actual usage.
Concrete size targets: One person: 3’ x 3’ infrared or 4’ x 4’ traditional — a properly built 2-person steam sauna works here too. Two people: 4’ x 6’ comfortably accommodates both. Four or more: 5’ x 7’ — generous without being wasteful. A 4-person cedar indoor sauna is sized for this footprint. Use the heater manufacturer’s cubic footage ratings. Calculate your room volume. Select accordingly. Undersized heaters fail to deliver. Oversized ones create safety risks. Match them precisely.
4. What Wood to Use — And What to Avoid at All Costs
Not all wood belongs in a sauna. Some species are comfortable and safe. Others become painful or release harmful compounds when heated. Western red cedar is the default recommendation for most builders. It handles moisture exceptionally well, stays stable through repeated heating cycles, smells pleasant, and remains comfortable against exposed skin at high temperatures.
Other safe choices: Hemlock — pale, nearly odorless, budget-friendly, available as pre-cut tongue-and-groove boards; Basswood — top pick for anyone with fragrance sensitivities; Nordic spruce — the standard in Finnish and Nordic commercial saunas. Never use these: Pine bleeds sap at sauna heat. Oak becomes hot enough to burn skin. Pressure-treated lumber releases toxic fumes when heated — a genuine health hazard. Install tongue-and-groove wall paneling horizontally, ¾” to 1” thick. Round all bench edges. Exposed skin meets sharp corners badly in a heat environment.
5. Walls, Framing, and Vapor — The Layer Nobody Talks About Enough
This is the phase that determines whether your sauna lasts ten years or collapses in two. Nobody photographs it. It happens inside the walls, out of sight. Do it right. Framing: Standard 2×4 construction, 16 inches on center. Nothing exotic required. Insulation: Fiberglass batt at R-13 in walls and R-22 or better in the ceiling. The ceiling is the most important surface — heat rises and escapes through a poorly insulated ceiling before it reaches anyone at bench height.
Vapor barrier: This is the step most DIY sauna builders either skip or do incorrectly, and it’s the one with the worst long-term consequences when wrong. Install an aluminum foil vapor barrier on the interior-facing side of the insulation. It reflects heat back into the room and blocks moisture from penetrating the wall cavity. Use nothing else — not plastic film, not standard housewrap. Seal every seam with foil tape. One gap is one moisture pathway that silently destroys framing from the inside.
6. Ventilation — The Mistake That Destroys Saunas from the Inside Out
A sauna with no ventilation is a sauna that will be destroyed by moisture — and dangerous to use in the meantime. The solution is two small openings in specific positions: a low intake vent near the heater, approximately 6 inches from the floor, and a high exhaust vent near the ceiling on the opposite wall with an adjustable damper. Cool air enters at floor level, heats as it rises, and pushes stale air out through the upper vent. The system runs on natural convection, no mechanical assist required.
Without this: CO₂ builds to unsafe levels during sessions. Between sessions, trapped moisture prevents the wood from drying, leading to mold growth inside the wall structure. Both outcomes are serious problems that proper ventilation prevents entirely. Two 4” x 6” openings in the right positions. Do not skip this step.
7. Heater Selection — Getting This Right Protects Your Investment
The heater is where under-investment creates the most visible failure. Match it to your room and every session works. Miss the sizing and nothing else compensates. Traditional electric heaters: Look for a unit with built-in controls or a wall-mounted panel. Capacity must match your room’s cubic footage. These units operate on 240V dedicated circuits, typically at 30 to 60 amps. The Harvia 6kW KIP is a common reference point for load planning discussions with your electrician.
You must hire a licensed electrician for all high-voltage wiring. This is a legal requirement in most jurisdictions and a safety requirement everywhere. Infrared heaters: Run on standard household current in most cases. A reliable 2-person far infrared cedar sauna plugs in without any special electrical work. For first-time builders, this advantage is significant and real.
8. The Door — One Overlooked Feature That Is Life-Safety Critical
Most people spend thirty seconds deciding on the door. Spend more time than that here. Two requirements are absolute. First: the door must be solid, not hollow-core. Solid construction handles the heat without warping. Second: it must swing outward, always. If a person loses consciousness inside, an outward-opening door stays accessible from outside even if the person’s body is against it. An inward-opening door can trap them.
Tempered glass doors reduce the enclosed feeling and let in light — a practical choice for smaller spaces. Wood and glass combinations work equally well. Hardware: magnetic catch or spring roller latch only. Install no lock. A lockable sauna door is a safety hazard without exception.
9. Lighting — Why Standard Fixtures Are Not an Option
This is a commonly skipped specification that causes expensive problems. Standard residential light fixtures are not rated for sustained sauna-level heat and humidity. Installed in this environment, they fail and the failure can be hazardous. Specify vapor-proof, heat-rated fixtures designed for high-temperature environments. Sauna-grade LED strip lights are an equally valid option and produce excellent ambient light with minimal heat output.
Mount fixtures below seated eye level or recessed behind bench structures. Overhead glare undermines the environment you’re creating. A compatible dimmer switch extends the functional range of the lighting from bright and energizing to dim and meditative. Worth the minor additional cost.
10. Gear and Accessories That Round Out the Experience
Bench setup: L-shaped configurations use corners efficiently and maximize seating. The upper bench hits maximum heat; the lower provides a milder option. A properly sized cedar sauna bench is the most important surface in the room — build or buy it well. Back support: A simple angled backrest built from bench material, or a pre-made wooden backrest for immediate use without cutting.
Steam bucket and ladle: Required for traditional saunas. The wooden bucket and ladle set is how you introduce water to the stones to produce löyly — the burst of enveloping steam that defines the Finnish experience. Monitoring: A wall-mounted thermometer and hygrometer at seated head height; a traditional sand timer to keep sessions timed without a phone. Floor system: Hard moisture-tolerant flooring beneath, topped with a removable slatted wooden mat for underfoot comfort and drainage.
11. The Break-In Process — Do Not Skip This
Fresh construction wood holds moisture that needs to be driven out before your first real session. Skipping curing means sitting in a sauna that smells strongly of new lumber and may not reach proper temperatures consistently. Run the heater to 140°F and hold it for one to two hours. Open the door briefly several times. The wood releases trapped moisture and the natural oils begin to stabilize. Do this cycle two to three times over consecutive days.
The wood aroma during curing can be pronounced, especially with cedar. It diminishes quickly with subsequent sessions. After curing is complete, run your first real session. Add water to the sauna stones if you went traditional. The session you’ve been picturing is finally, actually available to you.
You Already Know What to Do. Go Build It.
Every question that was stopping you has an answer now. Location. Heat type. Dimensions. Wood. Insulation. Ventilation. Heater. Door. Lighting. Accessories. Curing. In that order.
The project is finite. The timeline is a few weekends. The result is a room in your home that delivers on its promise every single time you step inside. There is no version of this where you look back and wish you hadn’t done it. Put the guide down. Start the location walk-through today.
🔍 Focus Keyphrase: home sauna DIY
📌 SEO Title: Home Sauna DIY: Build One Yourself — Complete Guide
🔗 Slug: home-sauna-diy-build-one-yourself
📝 Meta Description: Every question answered about building a home sauna yourself. Covers location, heater choice, wood type, ventilation, insulation, and accessories. Start your build right.